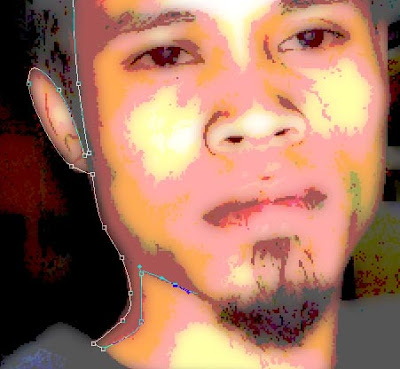
In the cartoon effect this time, we will create many forms manually using Pen Tools. Techniques such as this there is also a mention as Tracing. In fact, the techniques such as this will be more suitable if the run on Adobe Illustrator. However, because we are the subject of Photoshop, so now we just try to use Photoshop, although certainly the way of making will be more complicated.
If you want to see another example of the image trace this, a few days ago I never make. Can be seen in the Gallery page 2.
Trace the steps of making images
Step 1
Open a photo with Photoshop. In this tutorial, I use photo Mas Wasidi aka The Small.
Because of the condition of the image is too dark, so to be more visible difference between dark and light areas, then I set the first coloring use Image> Adjustment> Shadow Highlights.
Step 3
Duplicate this layer background, so we have a backup of the original image. To reserve guard, who know it requires the original image. , And finally, we also need the original image, to create forms that tricky, for example, eyes and lips.
How to menduplikat this with Ctrl + J, or with interesting names layer to the Create New Layer icon.
Step 4
Select the menu Image> Adjustment> Posterize. Fill a small value. For example, 4.

Goals step is to reduce the number of colors used.
Step 5
Duplicate another layer images that have diposterize this. Change Blending the option to become Darken.

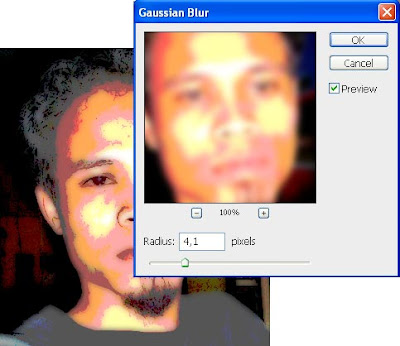
Select the menu Filter> Blur> Gaussian Blur. Set the value of adequate radius, while viewing the original image (do not see the image preview in the dialog box Gaussian Blur). This is the purpose of the steps that appear to make the border more firmly in every color available.

Step 6
Now we start making layers of steps to trace.
Create a new layer, by clicking on the icon Create a new layer (in the picture below, I mark with a red circle). And then change the opacity value in this layer to 0% (I mark with a blue circle).
Step 7
Select the Pen tool in the tool box out (red circle in the picture about the tutorial below).
Then do the settings in the options bar. Choose the icon Shape Layers (picture blue circle). Click the icon triangular geometry option (picture a green circle), then check the option Rubber Band.
On the right side of the settings, there are some icon again (picture purple circle). Of course you have learned in the tutorial about this before. If not, please read in first in the Ways of Shape.
Meanwhile, on the use of the pen tool can be read on the Photoshop Tutorial Making Headlines With Path Selection.
Step 8
Create a shape using the Pen tool. Make the face of the image.

Make a line around this path to connect the dots from beginning to end, so that the form of a wake

Repeat steps 6 and 7, but this time make the shape of the color area to another. Each is made in the shape of a new layer.
Amount of shape that made us limit between 2 to 4 color only.
Step 10
Change the value of opacity in the layer-layer shape that we made yesterday. Opacity we create up to 100%. So visible images covered by the colors.
To change the color on each layer shape, how to make do with 2 times click on the thumbnail-layer it. Then select a color.
As a guide in choosing the color of the skin-color, I include the following several colors that you can use.
Change the color on each face of all these.
Then create another form of ulangilah shape in all parts of the body, to the overall image of the closed-form shape.
In the eyes and lips, because this section, including the principal in the face to recognize someone, we first need to turn off some eye icon in the palette layer. So that we can trace with a view to make its original form, which is not tar-posterize.
For the beard, I use the Brush tool disapukan small size of the picture with preset settings Brush Scattering.
Step 11
To create the background image, create a new layer placed on the bottom of the order forms the shape. This new layer can be filled with color as your menu by selecting Edit> Fill.
Color should not be white, you can also use other colors, for example, the gradient Tools such as the following.
If all the pictures will be one, can be done by selecting the menu Layer> Flatten Image.
The tutorial Photoshop to create cartoons with this.


0 Response to 'Make a cartoon with Photoshop'
Posting Komentar