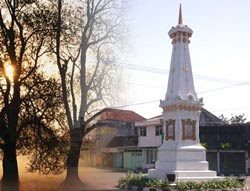
 At times this Photoshop tutorial I will be working on how to merge the images. Merging the picture is here is the visible image merge with one another on one side.
There are several methods / techniques in Photoshop that can be used to create effects such as this merger. For example, such as when using it, or Feather. I want to study in this tutorial is using the layer mask.
The merger with the image layer mask
Step 1
Open a picture with Photoshop (File> Open).
Step 2
Make sure that is a layer that is not locked (not the Background layer). For example, as in the image below.

To remove the key image, how to perform 2 times click on the name layernya. Then click OK in the dialog box that appears. By default, the name will be changed to layernya layer 0 (can also change your own name).

Step 3
We will merge to create the image, then make sure the file you are doing there two layers of images. If there is a new image? Yes open the first image, then enter into a file that we do with the move tool.
Step 4
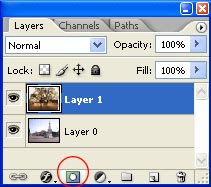
Select a position in the layer above, then click the Add Layer Mask icon (located at the bottom of the palette layer).

Step 5
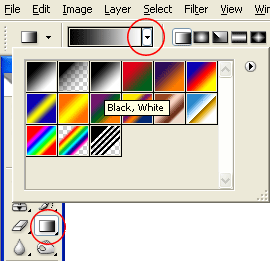
Select the gradient tool in the Toolbox Photoshop. Then in the Option bar, select the color gradation of black and white.

Step 6
Click and slide the pointer on the gradient was the tool of your image. If the result is less appropriate, repeat the steps again and click gesernya. No need to undo the past, because the step of making the color gradation will direct overwrite the previous step.

Easy going. Also vary with the gradation opposite direction. If the tint was created from left to right, now try from right to left. The result is a different form of transparency. Why so? Try to read the principles of the use of the masking layer on the articles of this tutorial.
 In the options bar, in addition to Linear gradation mode, there is also a radial, angle, Reflected, and Diamond. These forms can be used to make a gradation of other variations.


 Print this page


0 Response to 'how-merge-image'
Posting Komentar